Showing posts with label Recipes. Show all posts

Saturday, October 24, 2015

Hot Sausage and Mustard!

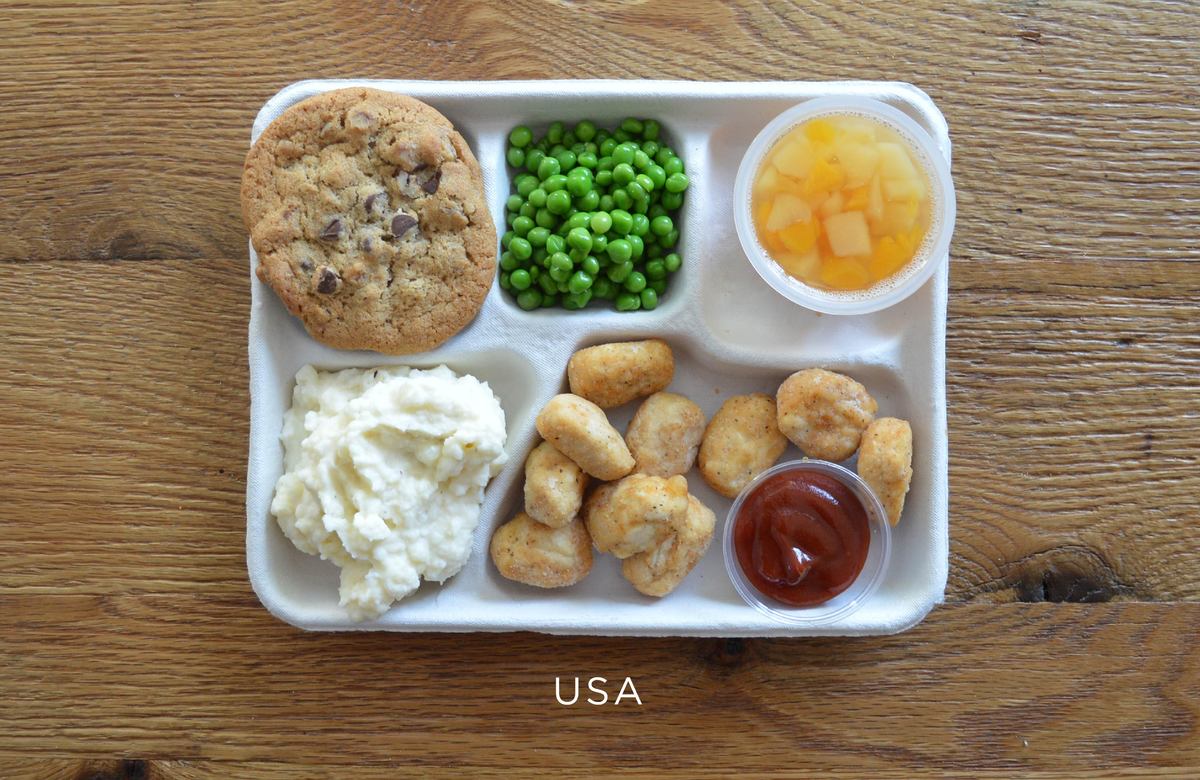
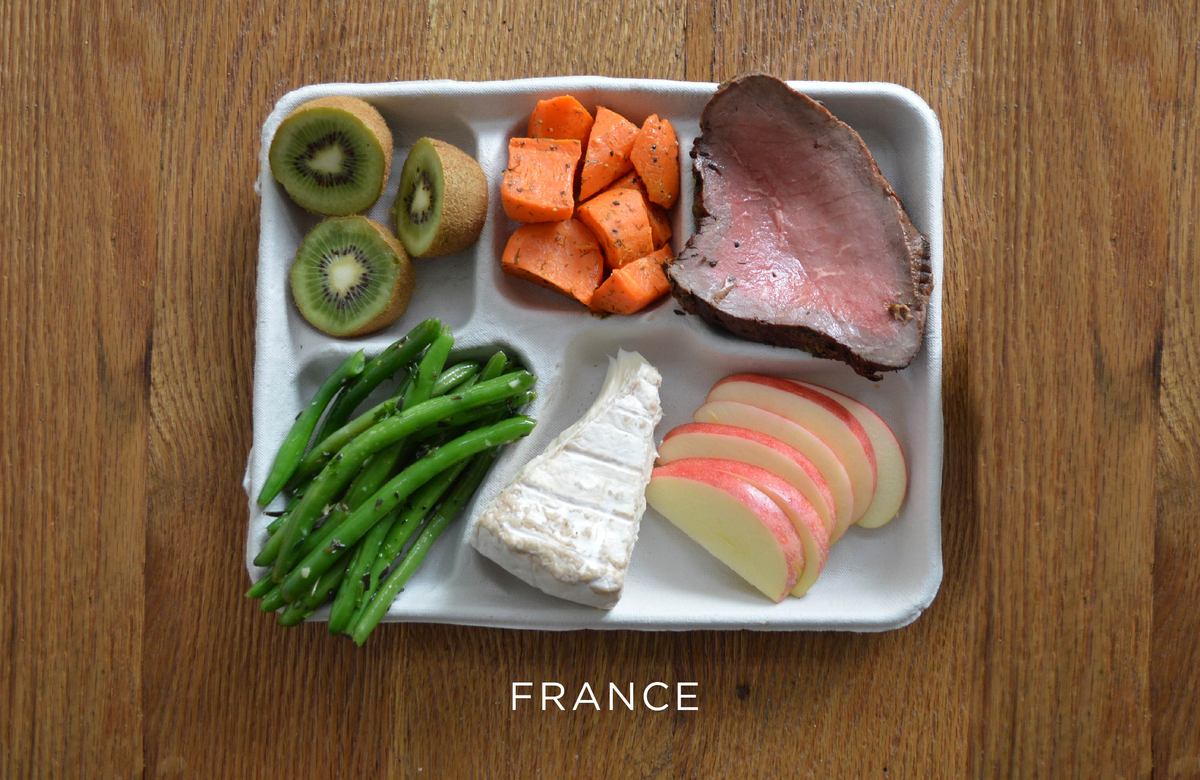
Per twitter stream, these school lunches in other countries make me weep for mine.  The cookie in the U.S. example about the same size as the piece of roast beef in the French lunch.  


"Compare cookie to roast beef"

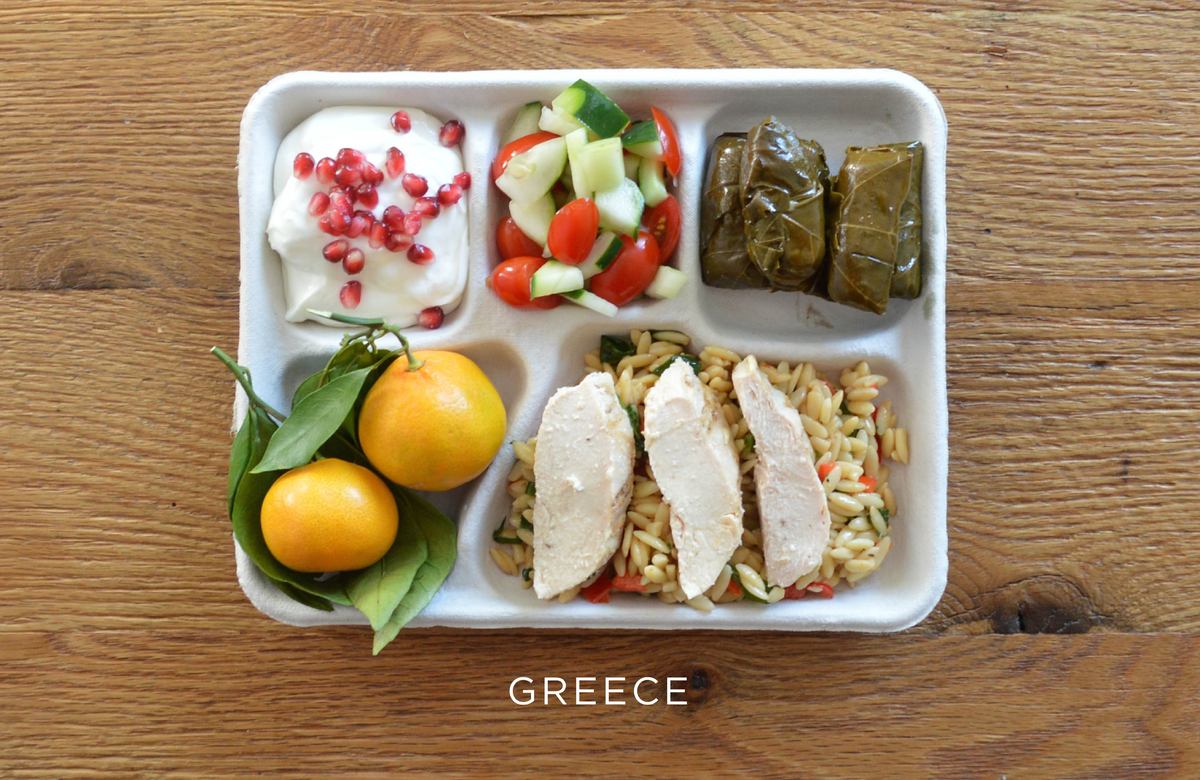
Those perfectly normal, everyday food items on school lunch plates in .. Brazil, Italy, Finland, South Korea, France, Ukraine, Spain .. even impoverished Greece?  --->>


"This is what (even) a poor country 
provides its children for a school lunch"


Here in the well-to-do U.S.A. (certainly much wealthier than Greece), those normal food items (i.e. from the nutrition community's well-known requisite food groups) are called "luxury" food items. (That means you're not supposed to expect to eat it - even if that is all that food is!)

No, you're supposed to expect to eat make-believe food.  The "let's pretend it's from one of the food groups" the way Reagan said catsup was a vegetable.  The other stuff?  That's for the crowd at the Waldorf.

And .. they wonder why childhood diabetes is at epidemic levels in the United States? 

Let's fund more studies to figure this out .. maybe in another couple of hundred years, we'll know why.  And maybe after another couple of hundred more, we'll do something about it.

So quit yer complainin' and finish those deep-fried cardboard chicken balls with red high fructose corn syrup!


Embedded image permalink
"What a lunch, my little pretties! What a school lunch!"


Friday, December 26, 2014

Holiday Hot Tumeric


Hot Tumeric  

(adapted from Dr. Sanjay Gupta's Calming, Creamy Tumeric Tea)

Ingredients

1 1/2 - 2 (8 oz) cups of plain almond milk or cow milk, regular, low-fat, or non-fat (Dr. Gupta's recipe uses almond milk)

1 teaspoon tumeric powder
1/4 teaspoon ginger powder
1 teaspoon cinnamon powder

1 teaspoon honey

whipped cream & additional cinnamon sprinkled, a few almonds

Optional:  a shot of amaretto


Procedure

1.  Heat mug of milk in microwave for 1 minute 30 seconds.

2.  Stir in well, tumeric, ginger and cinnamon.  

3.  Then stir in honey.

4.  Heat in microwave another 30 seconds.

5.  Stir again, well.

6.  If using amaretto, now add the shot or portion thereof.

7.  Add whipped cream, sprinkle a bit more cinnamon, and a few almonds.

Enjoy!
 
Discussion

I seem to be acquiring a regular taste for this hot drink, and as long as I can dress it up, and with a "less intense" ratio of tumeric to milk, than the good doctor prescribes.  The drink is quite spicy, while creamy and comforting at the same time.  As Dr. Gupta discusses, the tumeric has anti-inflammatory health benefits, among others.  He emphasizes heart-health;  it occurred to me, however, that another consideration could be gum health since it's described as an anti-inflammatory.  Ginger, cinnamon, and honey also have their cited health benefits, along with the hot milk. 

Consider this drink, too, a substitute for hot cocoa, during the holiday season, and especially if it's challenging to find slavery-free hot cocoa mix in your area. 


Optional 

Adults, you can also dress this holiday hot tumeric up with a shot of alcohol;  amaretto blends in very nicely, and right before you add the whipped cream, a dash more of cinnamon, and some real almonds.  

And I'm sure it goes good with cookies!

I suppose cow milk or whipped cream that is not non-fat, would take this drink out of an entirely heart-healthy category, according to Dr. Gupta.  Though I have no idea what the good doctor (or yours, if you can even see one in the U.S.A.) would advise there, and as far as cookies, alcohol, or gum health, either. 

The almond milk is really good with it, as long as you get a good brand for the almond milk - otherwise, I found regular milk better than poor quality almond milk.  With the good stuff, I used plain, not these flavored kinds like vanilla, etc.
 

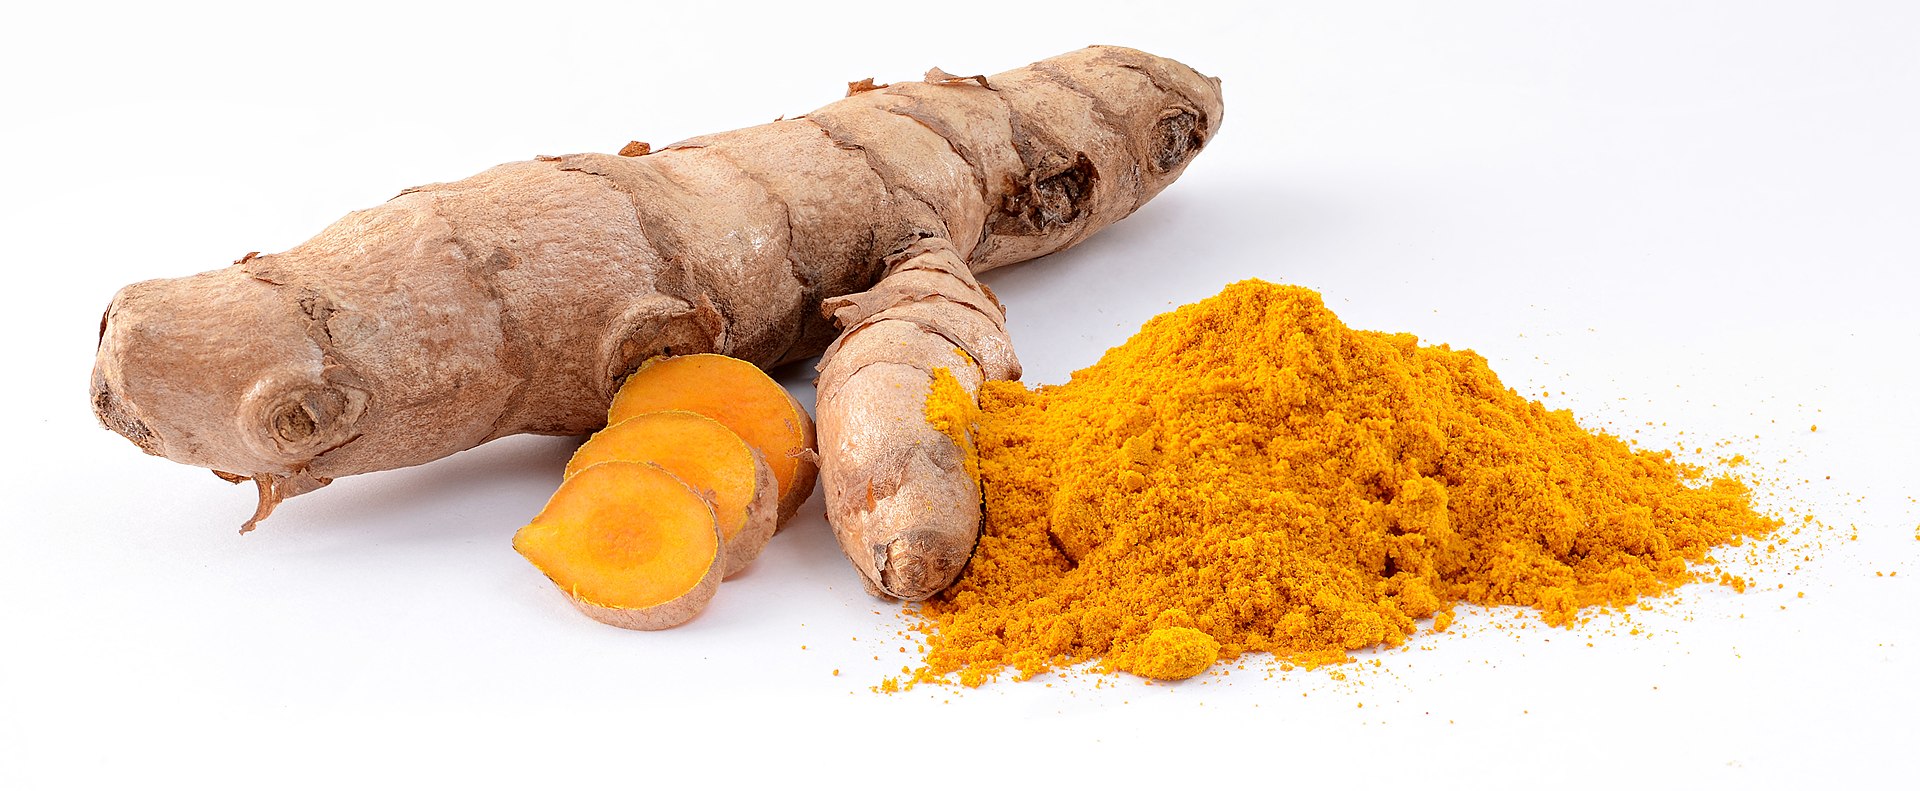
Photo credits: via wikipedia, top, Botanical view of Curcuma longa, second, photographer: John Hill, "Native turmeric in the bush near Cooktown, Queensland, Australia," third, photographer: Simon A. Eugster, "Turmeric rhizome and powder," fourth, photographer: Rajkumar6182, "Turmeric field in an Indian village."

Saturday, April 12, 2014

aubergine


File:Eggplant Flower in Hong Kong.JPGroasted aubergine

utensils

Pan (tin foil, optional)
Cutting board
Large knife

ingredients

1 or 2 standard grocery eggplants, as desired

olive oil - up to 1/4 cup

seasonings

sea salt
freshly ground black pepper
oregano
basil (fresh or dried)

procedure

1.  Preheat oven to 350 degrees.

2.  Wash the eggplant, dry, then cut off the stem end, cut it in half (horizontal to that stem), then quarter each half.

3.  Douse your pan generously with olive oil.  Then, taking each quartered eggplant piece, roll in the oil on each side, adding more oil to the pan, as needed for the additional pieces, arranging them skin-side down and about in your baking utensil.

4.  Sprinkle with your seasoning, as desired (go easy on the salt), and bake for 50 minutes (give or take a bit, depending on your oven).

Et voilà !  Serve as is, with a fork and serrated knife, by itself or any number of other dishes, from rice or potatoes, pasta, or various meats, including sausages.  These also keep nicely for the next day in the refrigerator to serve chilled with a salad, or to pack off with a lunch.


File:Eggplant display.JPG

discussion

If you've been faint hearted at the prospect of working with the tender aubergine, this basic recipe will get you through, with an outcome that is absolutely delicious.  I've found that the key, here, is oven timing; mine just perfect at 50 minutes.  If you overcook, the skin will become tough and brittle.  And you do want to eat the skin, which is delicious, and also loaded with fiber, as well as other nutrients.  Eggplant is a good meat substitute, as well, since it is high in protein.

If you can wait 50 minutes before eating, the recipe is indeed "fast food" because it is so easy and so quick to prepare.  There is no substitute for oven time with flavor, and with the microwave, here.  You have to roast this lovely vegetable in the traditional fashion.  (You can reheat, though, the next day;  still, I'd prefer it chilled and untouched by any microwave approach.)

Many eggplant varieties, so happy explorations (see yellow variety, for example, in the photo below)!  This recipe is with the standard sized purple eggplants found in many U.S. groceries.  (Of course, the smaller and longer Japanese eggplant, also found here, would have a different cooking time.)

More eggplant journeys here with my eggplant panini (and where I *did* use a microwave).  You can also recycle the roasted aubergine, the next day, and in that sandwich, rather than using the microwave version, which works in that case, as a time-saving preparation device.  

- o.s.r.


 http://upload.wikimedia.org/wikipedia/commons/9/98/Brinjal_Plant.JPG


*Photo credits/top, via wikipedia, photographer: Earth100, "Eggplant, also know as the aubergine, is a member of the plant family Solanaceae, shown here flowering in full bloom as photographed by Earth100."  Second, via wikipedia, photographer:Phoebe, "Display of heirloom varieties of eggplants, taken at the Baker Creek Second Annual National Heirloom Exposition in Santa Rosa, California, USA."  Third, also via wiki, photographer:Iaminfo, Brinjal or Solanum melongena, yellow eggplants or "Brinjal" from India: "The green fruits turn yellow when ripe."

Wednesday, March 19, 2014

Amaretto Oatmeal Chocolate Chip Cookies

http://upload.wikimedia.org/wikipedia/commons/7/71/Bernardino_Luini_001.jpgamaretto oatmeal chocolate chip cookies

utensils

cookie sheet or pan, covered (or not) with foil
large mixing bowl
sturdy mixing spoon
smaller mixing bowl
fork or egg beater

ingredients

DRY
1/2 cup white flour
1/2 cup whole wheat flour
1/2 cup oats
1/2 cup semi-sweet chocolate chips
1-2 teaspoons baking powder
2/3 cup of dark brown sugar

LIQUID
1 large egg
1/3 cup of canola oil, and another 1-2 tablespoons
1 shot of amaretto

procedure

1.  preheat oven to 350 degrees.

2.  spread foil on cookie sheet or baking pan bottom, spread 2 tablespoons canola oil on bottom to "grease."

3.  mix your dry ingredients together in the large mixing bowl.

4.  beat your egg with the rest of the canola oil and amaretto.

5.  add liquid ingredients to dry ingredients and mix thoroughly, using your hands (clean, of course) for convenience.

6.  then shape 9-12 cookies and lay them out on the foiled pan.

7.  bake for about 17-20 minutes, depending on your oven and the size you have selected.

Cool for 5-10 minutes before removing from pan;  enjoy!

Serve with milk, coffee or tea.

http://upload.wikimedia.org/wikipedia/commons/4/47/AlmondShakerbeforeafter.jpg

discussion

Amaretto, the key ingredient I added to this recipe, is  described by wiki as a sweet, almond flavored Italian liquer made from a base of apricot pits or almonds .. and sometimes both .. the legend being ..

In 1525, a Saronno church commissioned artist Bernardino Luini, one of Leonardo da Vinci's pupils, to paint their sanctuary with frescoes.[4] As the church was dedicated to the Virgin Mary, Luini needed to depict the Madonna, but was in need of a model. He found his inspiration in a young widowed innkeeper, who became his model and (in most versions) lover. Out of gratitude and affection, the woman wished to give him a gift. Her simple means did not permit much, so she steeped apricot kernels in brandy and presented the resulting concoction to a touched Luini.
For a variation of this recipe, leave out the oatmeal.  You can also use about 1/2 the semi-sweet chocolate chips (more manageable!).  For even more flavor, add some walnut dust (from the bottom of the walnut bag), or crush up a walnut or two very fine, and mix in.

For more amaretto recipes, try my decadent hot cocoa.


-- o.s.r.
 

*photo credit, top, via wikipedia, "Adoration of the Magi," detached fresco by Bernardino Luini, 1520-25 (Musée du Louvre); bottom, via wikipedia, photographer: Father of Nehrams2020, "An almond shaker shaking a tree during harvest. The first image shows the shaker grabbing onto the tree, and the second shows the shaker knocking the almonds off the tree."

Thursday, October 10, 2013

Southwestern Pizza

http://upload.wikimedia.org/wikipedia/commons/e/e3/Zea_mays_-_K%C3%B6hler%E2%80%93s_Medizinal-Pflanzen-283.jpg 

deep-dish southwestern pizza with mixed sweet peppers & corn

http://upload.wikimedia.org/wikipedia/commons/1/14/Cast-Iron-Pan.jpgutensils

One average size cast iron frying pan oiled with olive oil
A large spoon or spatula
A large knife or pizza cutter
A large mixing bowl
A measuring cup

You'll also need a clean cutting board or clean surface for rolling the dough out a little.  Also a small roller for this purpose - one that will preferably work in the cast iron fryer itself when you move the dough from the rolling surface to the pan.  I improvised, for example, with a clean vitamin container.

http://upload.wikimedia.org/wikipedia/commons/b/bb/Uskladn%C4%9Bn%C3%A1_mouka.JPGingredients

pizza dough

2 1/2 cups of white flour (bleached or unbleached)
1 cup of water
1/2 teaspoon of sea salt
1-2 tablespoons of olive oil
3 teaspoons of double-acting baking powder (if it doesn't say "double acting," I'm sure it's still fine)

pizza topping

1-2 tablespoons tomato sauce 
A few handfuls of frozen mixed peppers 
2-3 handfuls of frozen sweet corn  
A few handfuls of shredded mozzarella cheese

seasoning

freshly ground black pepper, dry or fresh basil 

optional - kalamata or green olives

procedure

1.  Preheat your oven to 400 degrees.

2.  In a large bowl, mix your pizza dough ingredients and knead in the bowl, anywhere from 1 to 2 to 3 minutes.

3.  Roll the dough out on a clean cutting board or surface until it is close to the size and shape of the cast iron frying pan.  Then place the dough in the cast iron frying pan and finish shaping it/rolling it out in the pan using the improvised "mini roller" (unless you have an actual mini roller).  With your fingers (clean hands, of course), shape the edges of the dough up around the frying pan so you have a bit of a "bowl effect" for holding the ingredients.

4.  Spread the tomato sauce on top.  Then spread around the frozen peppers, top with the sprinkling of corn, then the mozzarella cheese.

http://upload.wikimedia.org/wikipedia/commons/0/03/NRCSHI07012_-_Hawaii_%28716060%29%28NRCS_Photo_Gallery%29.jpg5.  Finish off with your dry basil and fresh ground black pepper.  (If you are using the optional olives, you can put them on before or after the oven.)

6.  Place it in the oven for 25 minutes and remove promptly.  (Due to oven variations, you may want to check yours 5 minutes sooner or a little later, depending on how fast things cook where you are or with your particular oven.)

Et voila!  A lovely southwestern pizza with pizzazz!  Serve with a nice salad and a glass of wine (for the adults) and you have yourself a satisfying repast.  Enjoy!

variations

There are countless variations with homemade pizza, including doughs, some of which I'll share again here at Sauk River ReviewYou can experiment with different cheeses (or none at all), real tomatoes, fresh herbs, spinach or other greens, meats, seafood, many other vegetables, and even fresh and dried fruits.  I'm also playing around with whole wheat varieties which I find a bit more challenging if you desire a lighter, fluffier result. 

discussion

It's been a long time since I posted a recipe, but what the hey.  Eventually, we'll have individualized posts at Sauk River Review so you can know who to blame and who to praise, depending on what they're writing about.

With attention this week on Idle No More, I was thinking about corn, which has been under a great deal of scrutiny these days, as far as global food politics are concerned, while corn is traditionally (and also) a sacred Native American cuisine. And with Thanksgiving around the corner, we remember how Native Americans taught the first Pilgrims how to grow corn and find food in order to survive the first harsh New England winters in a new land.


 http://www.sacredearth.com/Ezine/fall07/Corncobs.jpg

I wondered if sacred corn would combine well with homemade pizza, which I've been experimenting with.  I decided that it would, and combined with mixed sweet peppers, as these vegetables often work well together in other recipes, and peppers, of course, are popular additions to pizza in general.  Olives, optionally, also combine well with these flavors, including green varieties.

With pizza in general, I wanted to circumvent the processed frozen kinds many families purchase, often weekly, as an inexpensive, fast food meal, hopefully providing meal planners respite from time consuming kitchen preparations and clean-ups.  I wanted to see if it were possible to prepare homemade pizzas (a) easily and quickly, (b) economically, and (c) while keeping real nutritional needs in mind.  For while these processed pizzas may seem like the perfect solution on a busy week night, many of them contain a lot of unhealthy artificial additives, are extremely high in fat, cholesterol, and sodium, and offer very little by way of real nutrition.  

So I think people deserve better food.  If you've followed any other food posts here at Old Sauk River/Sauk River Review, it is my position that "luxury food," for the most part, is a non-sequitur.  Everyone has the right to eat healthy, affordable dishes as part of balanced meals that are not poisoned or destructive to human health.  

Looking at the google stats, it's been striking that one of Sauk River Review's more popular posts is the yam and white bean stew with leaks, something I developed over the years as a parent looking to provide economical and tasteful nutrition along with preparation conveniences. 

Although I like some frozen pizzas, I do find, for the most part, as you develop more discerning tastes, you still have to spend more money if you want to get a fresher and healthier frozen pizza.  So I wanted to learn how to make good pizza myself - and almost as easily and economically as sticking the frozen kind in a preheated oven.

In the process thus far, there have been a couple of books I looked at (but they're not paying me to review these books, so I won't bother telling you about it, at this point, at least) and I also looked at several pizza recipes on the internet.

I improvised with these various resources, and thus far, conjured this surprisingly pleasant and simple variation.

A critical factor was the absence of yeast, and not so much for the health factors some may cite, but because yeast is prohibitively expensive in many American households these days.  

So I wanted to make a pizza - a good pizza - without yeast.

I recommend you use a corn that honors the planet we share.

Hey, this could also be called "A Thanksgiving Pizza," couldn't it?  Peace, and happy pizza journeys!  


http://upload.wikimedia.org/wikipedia/commons/7/73/Corntassel_7095.jpg


*Image credits/top, via Wikipedia, Illustrator: Franz Eugen Köhler, Köhler's Medizinal-Pflanzen, "English: Maize: (a) Lower part of the plant (b) top of plant with male inflorescense (c) middle of plant with female inflorescenses (d) ear/cob: (1) two pollen grains of a male inflorescense (3, 4) female flowers (5) female flowers with stigma (6) fruit bottom view (7) fruit side view (8) fruit cross-section views"/second, via Wikipedia, photographer: Evan-Amos, "A cast-iron pan,"/third, via Wikipedia, photographer: Chemee2, "Stored flour in the Czech Republic,"/fourth, via Wikipedia, photographer: Scott Bauer, USDA Natural Resources Conservation Service, "Cluster of tomatoes from Ho Farms in Kahuku, HI,"/fifth, via Sacred Earth, Corn, Zea mays - Poaceae/bottom, via Wikipedia, photographer: Spedona, "Corn tassel."
Saturday, January 26, 2013

Popcorn

http://upload.wikimedia.org/wikipedia/en/e/ec/Improved_no2_Wagon.jpg 
Uploaded by Cbro10
An early popcorn machine in a street cart, 
invented in the 1880s by Charles Cretors in Chicago.


Old Fashioned Popcorn

Utensils

Pot with lid
Large bowl
Tablespoon
Optional - large spoon to toss finished popcorn

Ingredients

2-3 tablespoons of olive or canola oil
popcorn
sea salt

Assorted toppings such as parmesan or romano cheese, brewer's yeast, various herbs or spices such as paprika, freshly ground black pepper, basil.


http://upload.wikimedia.org/wikipedia/commons/7/73/Corntassel_7095.jpg
Courtesy of Wikipedia
Photographer:  Spedona 
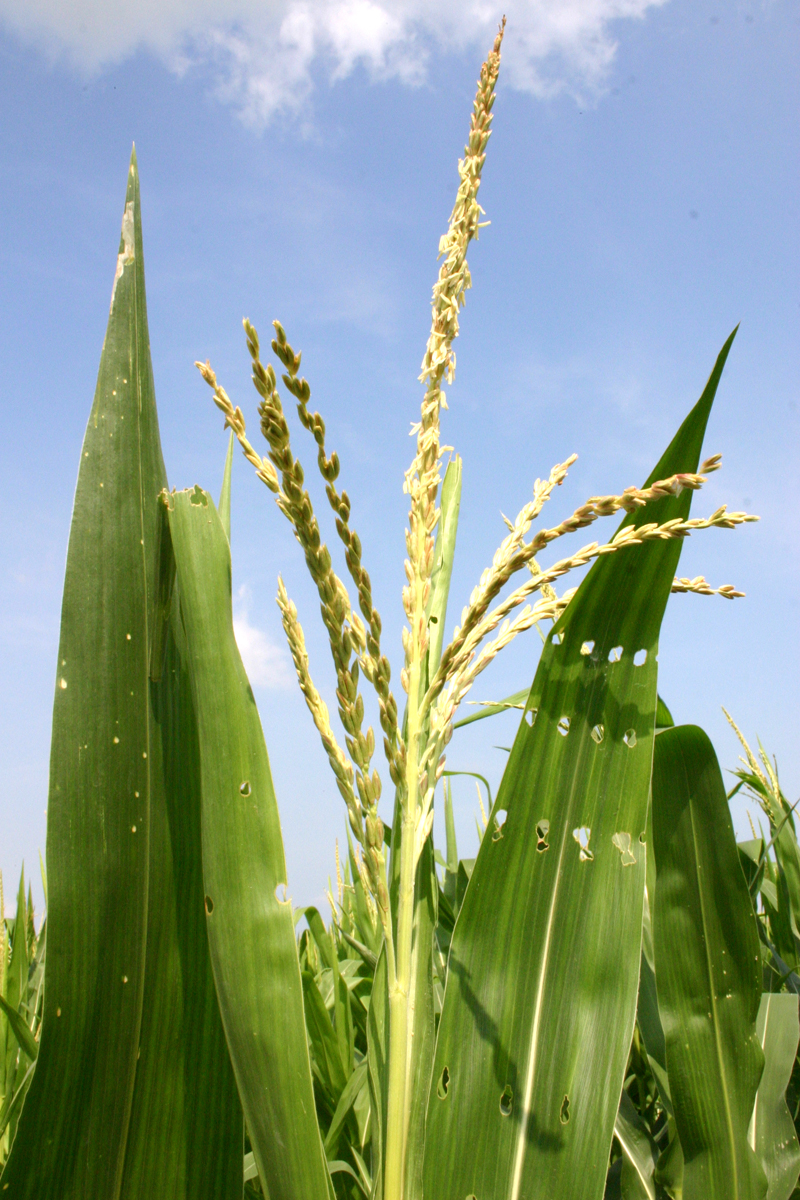
 "Corn male flower AKA corn tassel. The stamens of the flower produce a light, fluffy pollen which is borne on the wind to the female flowers (silks) of other corn plants."


Procedure

1.  Put your oil in a pan and add popcorn, at maximum, thinly covering the entire bottom of the pot, but not so much that the kernels lie on top of one another.

2.  Put the lid on and heat on low medium to medium.  Occasionally "shuffle" the pan back and forth over the heat, perhaps holding down the lid with one hand (while you hold the pot handle with the other - and using a towel or heat mitts of course), and so that you hear the kernels "shuffle" around, as well.

3.  As the kernels begin to pop, continue occasionally shuffling the pan until the popping slows down and almost completely stops.  Be careful not to heat too long, or the popped corn will burn.

Then, immediately turn off and remove the pot from further heating, and by dumping the corn into a large bowl.  Sprinkle with a bit more oil and sea salt, and toss with clean hands or a large spoon.

Add additional toppings, as preferred, or nothing else.

Serve and enjoy!  Great with a beer and movie.

Discussion

Ancient PopcornHistory.com reports recent discoveries indicating popcorn was popular in ancient Peru as far back as 4700 B.C. - about 1,000 years earlier than previously believed, and predating pottery use, showing that experimentation with corn was happening before the development of ceramics.   

Findings appeared January 17th in the journal Proceedings of the National Academy of Sciences.  Evidence was unearthed over the past three years at Paredones and Huaca Prieta, two coastal sites that were once prehistoric settlements. The earliest versions of the snack were prepared by roasting the corn cobs directly over fire, without the pot, and with later inhabitants of Peru’s northern coast developing the world’s oldest known popper around 300 A.D. -- a shallow vessel with a handle and a hole on top.  Researchers determined how the corn cobs were used by studying their characteristics indicating inhabitants were grinding the corn into flour as well as popping, as we modernists enjoy.

Photo credit/courtesy of History.com, photographer: Tom D. Dillehay, picture of ancient corn recently discovered, and predating earlier estimates for the first popcorn.
 

Sunday, September 9, 2012

Fruit Cup

Courtesy of Wikipedia
 Peach flower, fruit, seed, and leaves 
as illustrated by Otto Wilhelm Thomé, 1885

A simple morning aside, especially good for children, and as a alternative to fruit juices, even those that are "not from concentrate."   Slice up a fresh peach, combine with one or two other types of fruit - e.g. banana slices, small pieces of strawberry or a few grapes, pieces of cantaloupe, a scissor-snipped fig.

Feel like elaborating?  Add a dolup or two of cottage cheese or non-fat plain yogurt (vanilla, too, will suffice), sprinkle with 1-2 tablespoons of wheat germ, mix, add fruit.

Tuesday, September 4, 2012

A Tree Grows In Brooklyn


Courtesy of Wikipedia
Photographer:  Jkadavoor


Who ever knew such a tree could grow in Brooklyn so easily?  I've been putting these sweet delights in all kinds of recipes, finding they combine beautifully with many flavors and foods - including hummus, cream cheese, salads, baked potato combos, meats and curries (use clean scissors to "slice them up" easily) - I even tried figs in an omelette once ...  Wiki reports a variety of figs, the lovely branch pictured above, native to sub-Saharan Africa, the Arabian Peninsula, and India - and also known as Brahma's Banyan and Rough Banyan.  

Sunday, September 2, 2012

Daily Toast


Courtesy of Wikipedia
Photographer:  Reutc
  A dish of hummus with pine nuts at the Maxim restaurant in Haifa, Israel.
 
 
Toast With Hummus And Vegetables
 
As blogged on other occasions, I like trying different ways of enjoying morning toast.  In this creation, I spread hummus on pieces of a rustic sliced loaf, and added chopped persian cucumber (regular cuc is fine), chopped kalamata olives, chopped cherry tomatoes, sprinkled paprika, and freshly ground black pepper.  

Enjoy with a strong cup of coffee!  Variations might include or substitute chopped dates or sweet peppers.
 
 
 Courtesy of Wikipedia
Photographer:  Art Poskanzer
Olive trees in summer


Friday, August 10, 2012

sweet peppers wrap


courtesy of wikipedia
a variety of colored bell peppers


sweet peppers wrap with garlic and chicken

appliances

- wok and stirring spoon (for peppers and garlic)
- baking pan and lid (or alumnium foil - for roasting chicken breast)
- pot with lid (for rice)
- grater (if you are grating or shredding the cheese yourself)


courtesy of wikimedia
photographer:  cyclonebill
"parmesan"


ingredients

1-4 large burrito wraps, depending on how many are eating or how hungry they are.  then the ingredients are based in 3 groups as follows:

for peppers and garlic -

* 1-2 tablespoons of canola oil
* about 8 oz of green, yellow, and red bell pepper strips, frozen (or 1/2 a 16 oz package)
* 5-7 cloves of fresh garlic, peeled and sliced

for chicken -
 
* 1 boneless, skinned chicken breast
* 1-2 tablespoons of olive oil (for chicken breast roasting)
* juice of 1/2 lemon
* seasonings, to taste - curry, paprika, sea salt, freshly ground black pepper

for rice - 

* 1 cup of brown rice
* 2-3 cups of chicken stock (or plain water)

additionally -

* grated or shredded parmesan and/or romano cheese

courtesy of wikimedia
photographer:  jonathunder
 "A basket of garlic (allium sativum) offered for sale at the farmers' market in Rochester, Minnesota"

procedure

1.  prepare your chicken.  preheat oven to 350 degrees.  place chicken breast in roasting pan, add a little olive oil, lemon juice, and seasonings, as indicated (and to taste).  I prepared mine with rather generous amounts of curry and a very nice paprika i found at a local food co-op.  roast covered in the oven for about 1/2 hour or a little longer (if the chicken isn't ready yet).  you do want your chicken moist, though.

2.  prepare your brown rice after your chicken goes into the oven.  combine rice and chicken stock (or alternatively, just water), bring to a boil in a pot with a lid, lower heat, and simmer covered for about 20 minutes, or until water is absorbed and rice is fluffy. 

3. prepare your garlic cloves.  oil your wok and add the garlic.  a few minutes before the chicken and rice are ready, heat up your wok, browning your garlic cloves nicely at the same time, and to desired amount.  before they are "too" crisp, add your frozen peppers and stir and toss for 3-5 minutes until ready.

4.  serve your chicken, rice, and stir-fried sweet peppers and garlic cloves on wraps.  top with grated or shredded parmesan and romano.

enjoy!  serves anywhere from 2-4 people, depending on appetites.


courtesy of wikimedia
photographer:  Aravindrocks2
 "naatu kolhi"

discussion

you may find that the mixed sweet peppers and garlic in this recipe make other processed condiments moot.  and while healthful variations abound.  this recipe also stretches a chicken breast - or other meats you may find tasty in a burrito.  you can, of course, use fresh peppers, along with other varieties like the spicier ones.  but for those who seek convenience, or can't get to fresh food markets easily, mixed frozen bell peppers along with fresh garlic and frozen boneless chicken breasts are a way to still create tasty healthful meals, and more economically, with fewer highly processed, artificial, and potentially poisonous ingredients. as always, the better the quality of your ingredients (meat, frozen vegetable varieties, etc.), the better the food will taste.

Monday, July 9, 2012

summer omelette

courtesy of wikipedia
photographer:  jack gavigan
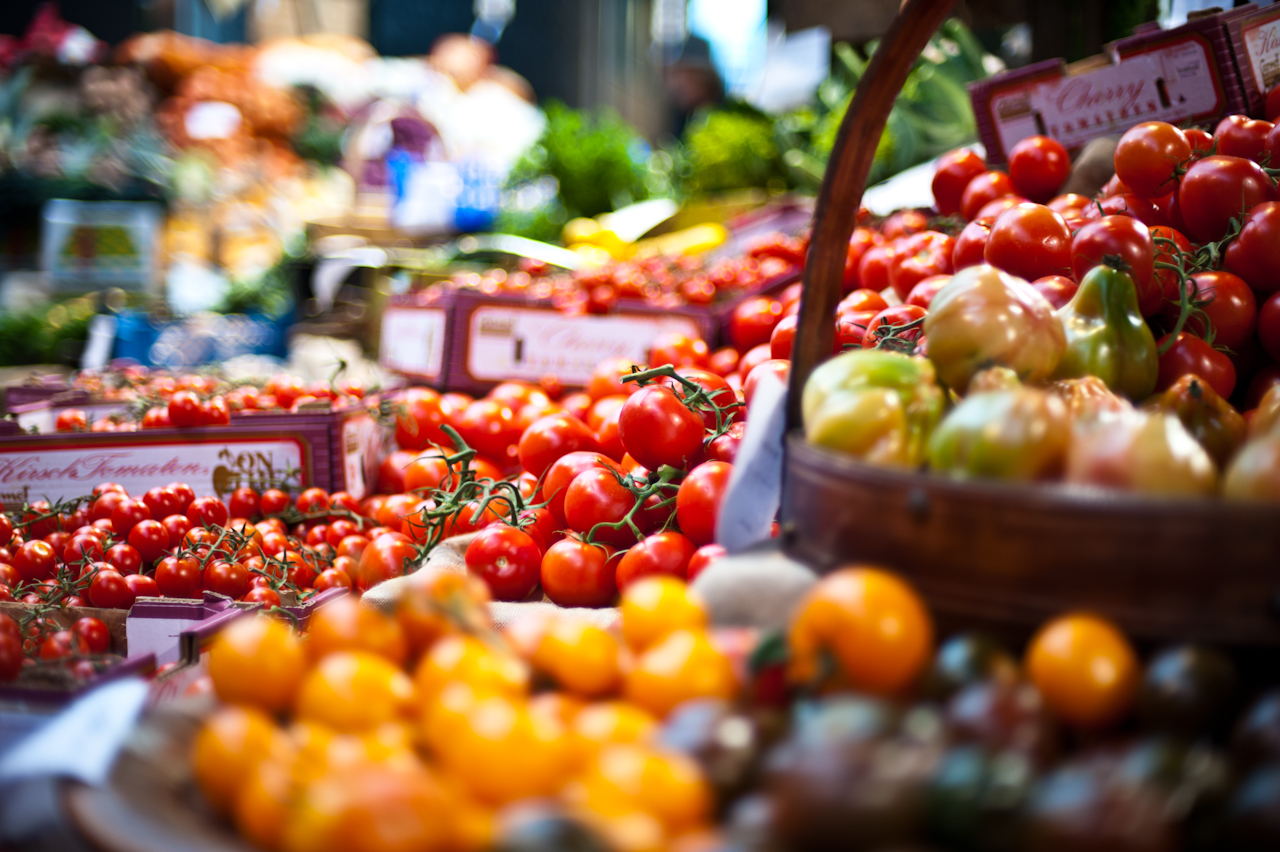
Borough Market in London, England on 28th November 2009


summer omelette with roasted tomatoes

appliances

10" cast iron pan
spatula

mixing bowl
fork or egg beater

cutting board
knife 

pot holders or thick towels for handling the hot pan


courtesy of wikipedia
photographer:  yuvalif
cast iron pan with blue handle


ingredients

1 medium sized yellow or white onion, sliced and chopped
2-3 cloves of garlic - peeled, sliced, and chopped
 
several red tomatoes on a vine, each cut into a few thick slices

6 large eggs
a few dashes of milk 

about a fist-sized mound of your shredded cheese of choice (examples: cheddar, asiago, or some mixture)

1-2 tablespoons of olive oil

sea salt, freshly ground black pepper, a few generous sprinkles of freshly dried basil


 courtesy of wikipedia
photographer:  raysonho @ grid engine
eggs in a supermarket

procedure

1.  preheat oven to 350 degrees;  prepare your onions, garlic, and shredded cheese.

2.  follow blog instructions for preparing roasted tomatoes with olive oil and garlic - here at this pasta recipe link - but do it in a cast iron pan instead, and using the seasoning indicated for this recipe.  In addition to sprinkling with chopped garlic, add chopped onion, too.

3.  roast in oven for about 1/2 hour - 40 minutes.

4.  while tomatoes are roasting, beat your eggs with the milk - when the tomatoes are ready (and carmelizing nicely), add your eggs to the cast iron pan, then your grated cheese (arranging as needed), and return to the oven for another 15 -20 minutes.

Serve and enjoy!  

Slice in pizza style wedges, garnishing each with a sprig of parsley or cilantro.  The wedges should come easily out of the pan with a spatula.


discussion

the cast iron pan renders this recipe especially iron rich, while also convenient. 

baked omelette can be served for breakfast, lunch, or dinner - and leftovers refrigerate nicely in sealed containers (no more than a day or two) for snacks or easy early morning protein.

for lunch or a light dinner, serve with salad, oven fries, or grain dishes - also, a very well chilled white wine. 

variations include adding other vegetables to the cast iron pan for roasting with the tomatoes, such as lightly oiled and seasoned asparagus, brussel sprouts, or broccoli. 


Wednesday, June 13, 2012

summer chili

courtesy of wikipedia
photographer:  FiveRings
a pot of traditional chili con carne (with meat)


summer vegetarian chili - a fast food recipe


ingredients

a tablespoon or two of olive oil (alternatively, canola oil)

1 large sweet onion, chopped
3-5 cloves garlic, sliced and chopped

1 28 oz can of diced tomatoes
1 15 oz can of pinto beans, preferably low sodium and organic
1 15 oz can of black beans, prefereably low sodium and organic
1 12 oz package of soy chorizo

chopped mixed greens to taste - e.g. kale, collard greens, turnip greens, swiss chard, and spinach

seasonings

1/2 to 1 tablespoon dried basil (fresh, of course, is preferable)


courtesy of wikipedia
photographer:  russell lee
preparing plates of tortillas and beans
to sell to pecan shellers,
san antonio, texas, 1939


procedure

sauté your onion, garlic, and basil in the olive oil in a large pot, and over a low to medium heat for a few minutes or until softened, but not browned.  add the rest of your ingredients, stirring in between, and while adding water to taste, enough to cover everything, about two 28 oz canfuls. 

heat to boiling, covered, on a medium to high flame, stirring frequently throughout, then lower to a simmer for a few minutes to 15 to 30 minutes, depending on how deeply you desire a greens flavor infused in your stew. 

enjoy! serve over brown rice with a grated sharp cheese melted instantly on top or sprinkle with a tasty nutritional brewer's yeast.  then garnish with a few kalamata olives per bowl.  you can also add a dolup of yogurt (in lieu of sour cream or the aforementioned cheese and yeast toppings).

nice with a glass of red wine for the grown-ups, and accompanied with nachos or a crusty bread or sandwich to dip.

discussion

this is a great fast food recipe not only for initial prep time, but refrigeration during the week, and reheating with a microwave in a ready-to-serve dish. 

NOTE:  the vegie chorizo is already sodium heavy, so watch out with the canned beans you select (i.e. sodium content) - and do not add any salt to this recipe.

courtesy of wikipedia
photographer:  Michael Castielli
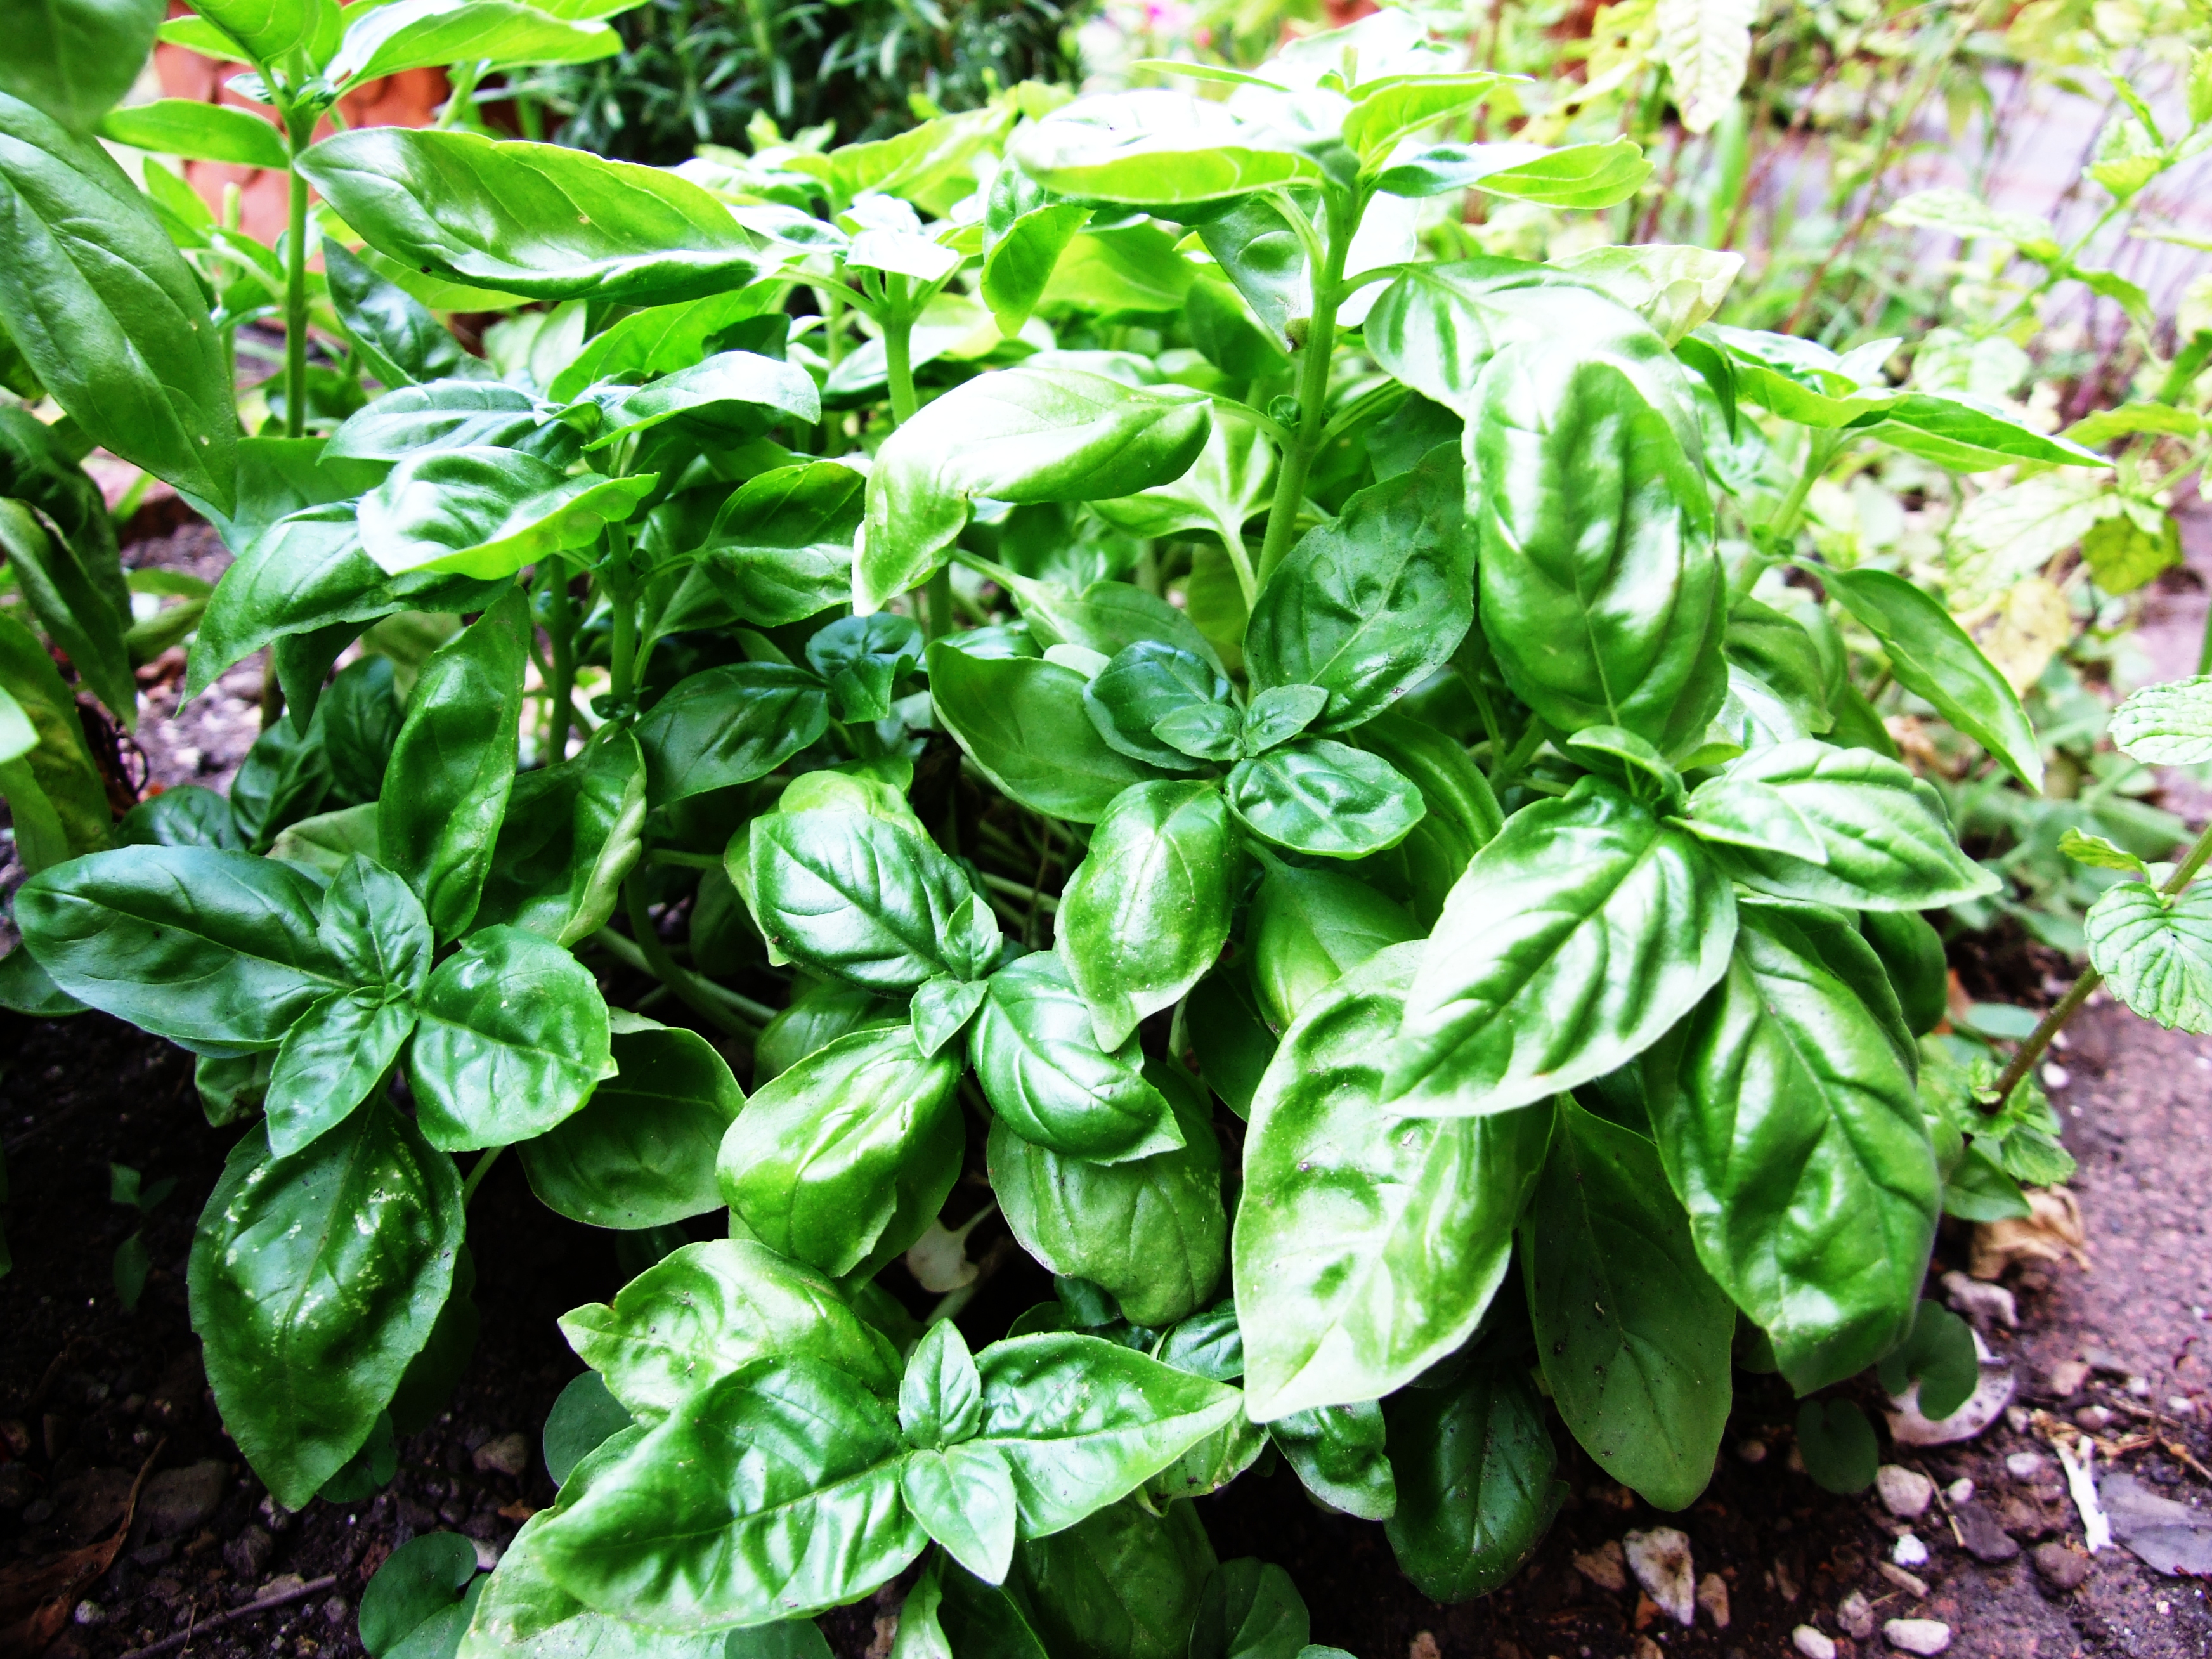
basil